
Description
Inspired by classic works of art, these color grading actions for photoshop will add subtle tones to your images and a bit of drama. This set of 5 color grading actions was created from some of my favorite portraits that I have created. I can’t wait to see what you create with them. Actions have been tested and work with current versions of Photoshop for Mac & PC.
BEFORE AND AFTER COLOR GRADING ACTIONS
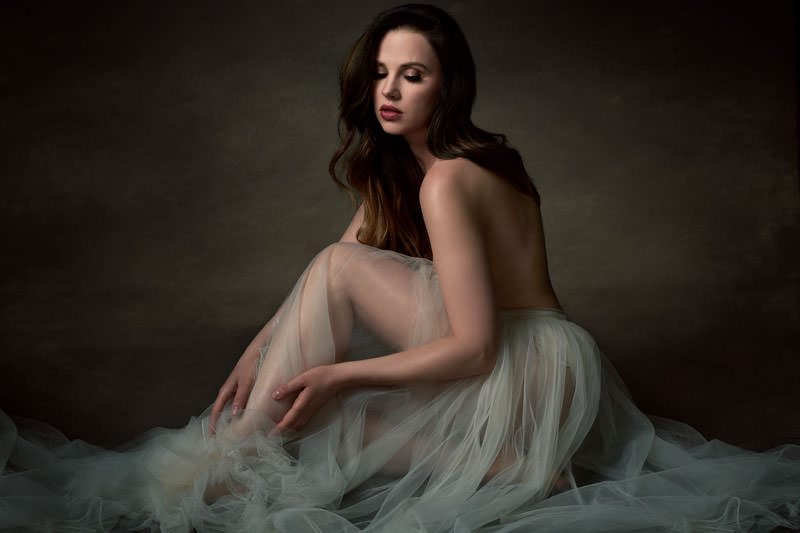
Ben Marcum Color Grading Photoshop Action 1

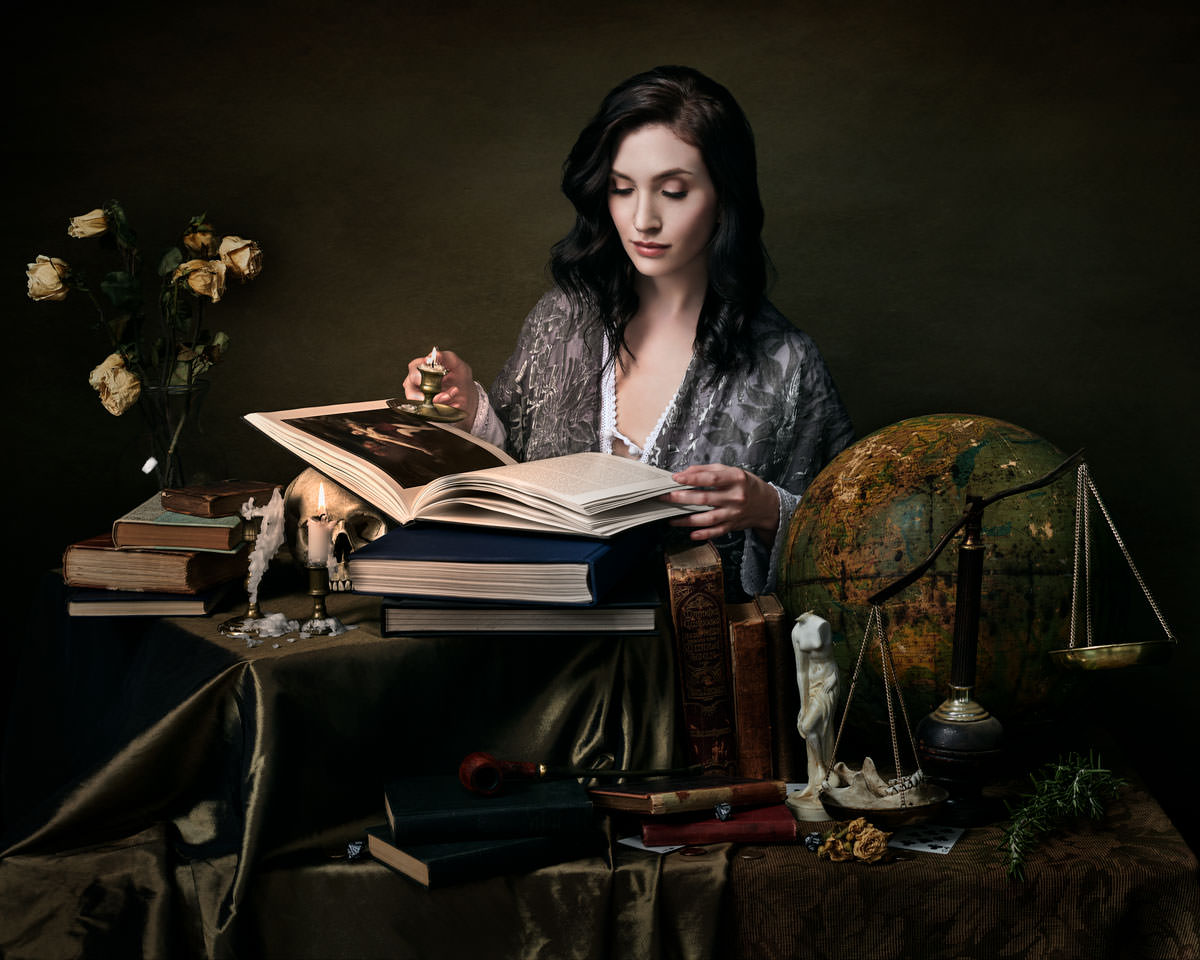
Ben Marcum Color Grading Photoshop Action 2


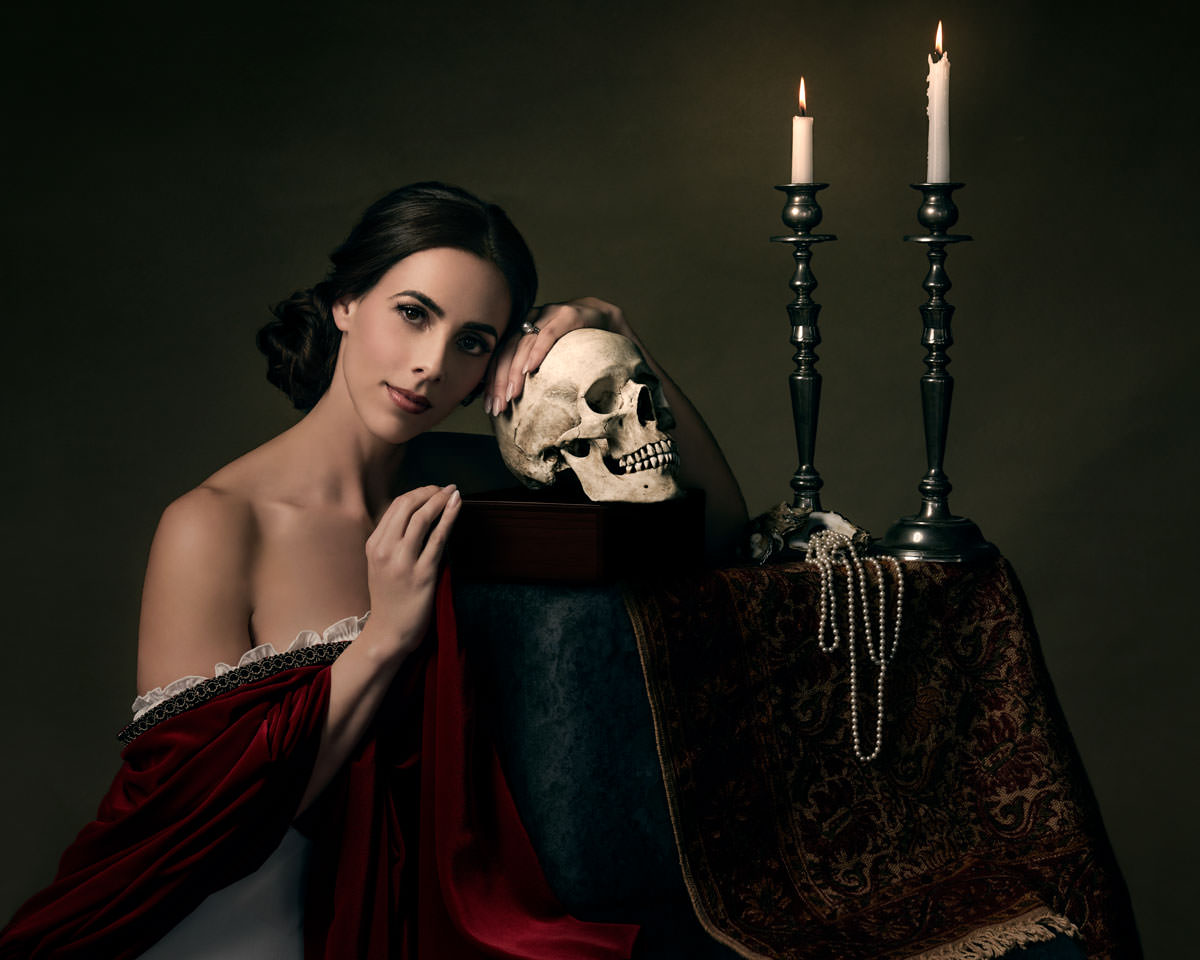
Ben Marcum Color Grading Photoshop Action 3

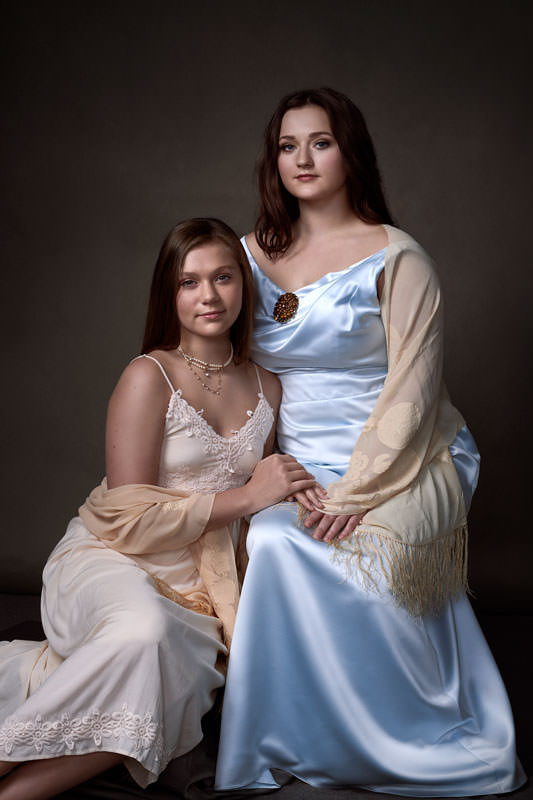
Ben Marcum Color Grading Photoshop Action 4

Ben Marcum Color Grading Photoshop Action 5

INSTALLING YOUR NEW COLOR GRADING ACTIONS
To install your new actions, follow these steps
- Open Photoshop and your actions panel. (if your actions panel is not already open you can find it by going to the “windows” tab at the top of your screen and then select “actions”)
- Click on the menu icon in the upper right-hand corner of the actions panel (the 3 stacked lines)
- Scroll down until you find “Load Actions” and click on it
- Navigate to where you downloaded your file and open it
- Your new actions should be loaded in the panel!
USING YOUR NEW ACTIONS
Once you run an action, you will see that it creates multiple layers in a folder. Each layer has a white or a black layer mask.
White on a layer mask means that element is visible.
Black on a layer mask means that element is invisible
This is where you get to be creative with these layers. Use a paintbrush the paint on the layer masks where you do or do not want the color. You can also change layer opacity and blend modes to suit your image.
Another way to mask/unmask parts of your images is with luminosity masks. To create one, select the layer mask on the layer you’d like to affect and make sure it is white (don’t worry you can invert it later).
Next, go to the “Image” tab at the top of your screen then scroll down to “Apply Image”. Make sure the layer is set to “Merged” and the blending mode is set to “Multiply” then click ok. once the mask is created you can adjust how dense the mask is by selecting the layer mask and hitting command (mac) /control (pc) +L to bring up a levels adjustment.